GitLab Community Edition (CE) là một nền tảng DevOps mạnh mẽ, mã nguồn mở giúp các đội DevOps hợp tác, quản lý mã và tối ưu hóa quy trình phát triển phần mềm. Nó rất phổ biến trong giới lập trình viên về CI/CD và thường được xem là một trong những công cụ tốt nhất. Quan trọng nhất là bạn có thể cài đặt nó miễn phí.
Why Choose GitLab CE?
GitLab CE không chỉ là một kho mã nguồn; nó là một bộ công cụ DevOps hoàn chỉnh. Nó cung cấp:
-
Quản lý phiên bản (Version Control):
- Đây là tính năng giúp quản lý mã nguồn của dự án. Dựa trên Git, GitLab CE cho phép bạn lưu trữ và theo dõi mọi thay đổi trong mã nguồn, giúp cộng tác dễ dàng hơn giữa các lập trình viên. Bạn có thể xem lại lịch sử thay đổi, phục hồi phiên bản trước nếu cần.
-
Theo dõi công việc (Issue Tracking):
- GitLab có hệ thống quản lý công việc giúp bạn tổ chức và ưu tiên các tác vụ, lỗi (bug), và yêu cầu cải tiến. Điều này giúp bạn theo dõi quá trình phát triển dự án, phân công công việc rõ ràng cho từng thành viên trong nhóm.
-
Tích hợp liên tục và triển khai liên tục (CI/CD):
- CI/CD giúp tự động hóa các quy trình xây dựng (build), kiểm thử (test), và triển khai (deploy) phần mềm. Mỗi khi có thay đổi trong mã nguồn, GitLab CE có thể tự động chạy các bài kiểm thử và triển khai phiên bản mới, giúp bạn nhanh chóng phát hiện lỗi và đưa sản phẩm ra thị trường nhanh hơn.
-
Tính năng bảo mật (Security Features):
- GitLab cung cấp các công cụ để quét mã nguồn tìm lỗ hổng bảo mật. Điều này giúp phát hiện sớm các vấn đề bảo mật và quản lý các điểm yếu trong mã nguồn trước khi phát hành.
-
Các tính năng khác (And Much More):
- Ngoài các chức năng trên, GitLab CE còn cung cấp nhiều công cụ khác như quản lý dự án, wiki nội bộ, quản lý môi trường phát triển, và tích hợp với nhiều công cụ khác để phục vụ toàn bộ vòng đời phát triển phần mềm.
Step 1 – Update Ubuntu
Tốt nhất là nên cập nhật hệ điều hành Ubuntu.
apt update -y
apt upgrade -y #optional
Nếu bạn chọn nâng cấp hệ điều hành, có khả năng cao là bạn sẽ cần khởi động lại.
Step 2 – Install GitLab Dependencies
Bạn cần cài đặt ca-certs và postfix để chạy GitLab CE.
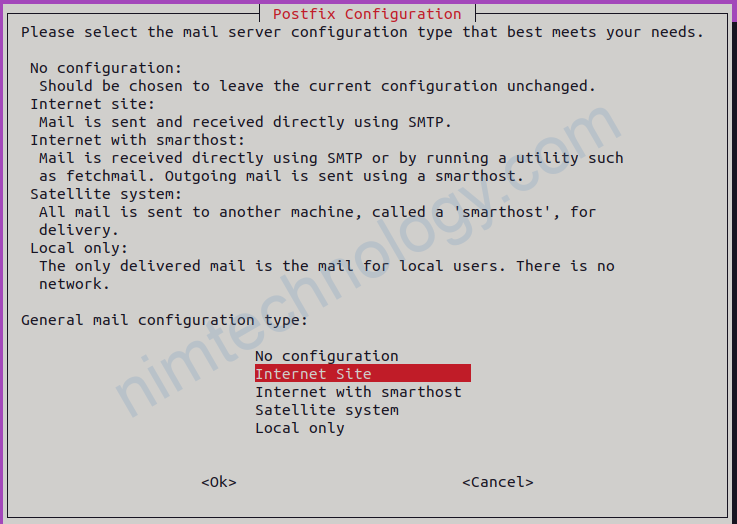
apt install ca-certificates postfix -yTrong quá trình cài đặt postfix, chọn “Internet Site” và nhập tên miền của máy chủ của bạn.

Step 3 – Add the GitLab Repository
Tiếp theo, bạn cần cấu hình repo GitLab. Nó không có sẵn theo mặc định.
curl -sS https://packages.gitlab.com/install/repositories/gitlab/gitlab-ce/script.deb.sh | sudo bash

#Example Output:
Detected operating system as Ubuntu/jammy.
Checking for curl...
Detected curl...
Checking for gpg...
Detected gpg...
Running apt-get update... done.
Installing apt-transport-https... done.
Installing /etc/apt/sources.list.d/gitlab_gitlab-ce.list...done.
Importing packagecloud gpg key... done.
Running apt-get update... done.
The repository is setup! You can now install packages.
Step 4 – Install GitLab CE
Bây giờ bạn có thể cài đặt GitLab CE.
apt install gitlab-ce -y

#Example Output:
Reading package lists... Done
Building dependency tree... Done
Reading state information... Done
The following packages were automatically installed and are no longer required:
  libflashrom1 libftdi1-2
Use 'apt autoremove' to remove them.
The following NEW packages will be installed:
  gitlab-ce
0 upgraded, 1 newly installed, 0 to remove and 2 not upgraded.
Need to get 989 MB of archives.
After this operation, 3084 MB of additional disk space will be used.
Get:1 https://packages.gitlab.com/gitlab/gitlab-ce/ubuntu jammy/main amd64 gitlab-ce amd64 17.1.1-ce.0 [989 MB]
Fetched 989 MB in 15s (65.5 MB/s)
Selecting previously unselected package gitlab-ce.
(Reading database ... 110340 files and directories currently installed.)
Preparing to unpack .../gitlab-ce_17.1.1-ce.0_amd64.deb ...
Unpacking gitlab-ce (17.1.1-ce.0) ...
Setting up gitlab-ce (17.1.1-ce.0) ...
It looks like GitLab has not been configured yet; skipping the upgrade script.

       *.                  *.
      ***                 ***
     *****               *****
    .******             *******
    ********            ********
   ,,,,,,,,,***********,,,,,,,,,
  ,,,,,,,,,,,*********,,,,,,,,,,,
  .,,,,,,,,,,,*******,,,,,,,,,,,,
      ,,,,,,,,,*****,,,,,,,,,.
         ,,,,,,,****,,,,,,
            .,,,***,,,,
                ,*,.


     _______ __  __          __
    / ____(_) /_/ /   ____ _/ /_
   / / __/ / __/ /   / __ `/ __
  / /_/ / / /_/ /___/ /_/ / /_/ /
  ____/_/__/_____/__,_/_.___/


Thank you for installing GitLab!
GitLab was unable to detect a valid hostname for your instance.
Please configure a URL for your GitLab instance by setting `external_url`
configuration in /etc/gitlab/gitlab.rb file.
Then, you can start your GitLab instance by running the following command:
  sudo gitlab-ctl reconfigure

For a comprehensive list of configuration options please see the Omnibus GitLab readme
https://gitlab.com/gitlab-org/omnibus-gitlab/blob/master/README.md

Help us improve the installation experience, let us know how we did with a 1 minute survey:
https://gitlab.fra1.qualtrics.com/jfe/form/SV_6kVqZANThUQ1bZb?installation=omnibus&release=17-1

Scanning processes...
Scanning linux images...

Running kernel seems to be up-to-date.

No services need to be restarted.

No containers need to be restarted.

No user sessions are running outdated binaries.

No VM guests are running outdated hypervisor (qemu) binaries on this host.
Step 5 – Configure GitLab CE
Configure External URL:
nano /etc/gitlab/gitlab.rbTìm dòng external_url và thay thế nó bằng miền hoặc tên máy chủ của bạn:
external_url 'http://gitlab.turbonet.uk' Save and Close
Apply Configuration:
gitlab-ctl reconfigureNote: Việc cấu hình lại có thể mất vài phút để hoàn tất.
Configure Initial Root Password:
Note: GitLab tạo một mật khẩu root tạm thời; bạn sẽ được yêu cầu thay đổi nó khi đăng nhập lần đầu tiên.
cat /etc/gitlab/initial_root_password

#Example Output:
# WARNING: This value is valid only in the following conditions
#          1. If provided manually (either via `GITLAB_ROOT_PASSWORD` environment variable or via `gitlab_rails['initial_root_password']` setting in `gitlab.rb`, it was provided before database was seeded for the first time (usually, the first reconfigure run).
#          2. Password hasn't been changed manually, either via UI or via command line.
#
#          If the password shown here doesn't work, you must reset the admin password following https://docs.gitlab.com/ee/security/reset_user_password.html#reset-your-root-password.

Password: mysuperstrongpassword=

# NOTE: This file will be automatically deleted in the first reconfigure run after 24 hours.
Lưu lại mật khẩu gốc này; đây là mật khẩu ban đầu của bạn.
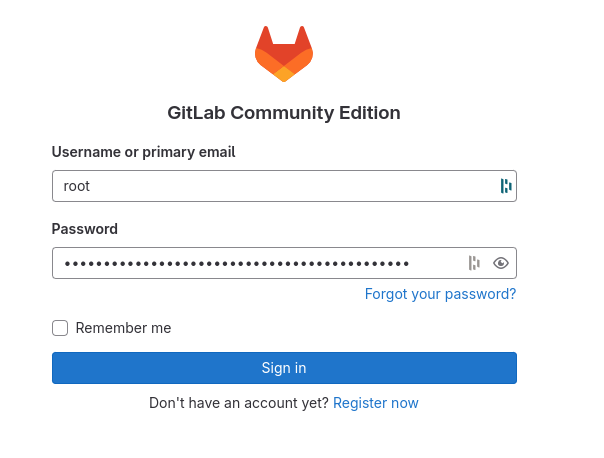
Step 6 – Log Into Your GitLab Server
Đảm bảo bạn đã thiết lập chuyển tiếp DNS tại nhà cung cấp tên miền của bạn. Tôi sử dụng Cloudflare và tôi đã phải tạo một bản ghi A cho địa chỉ IP dịch vụ của mình.
Deactivate Public Logins
Máy chủ của tôi được lưu trữ trên đám mây công cộng, vì vậy để đảm bảo an ninh, tôi cần tắt tính năng remote signups.

Bây giờ hãy cấu hình máy chủ của bạn chỉ cho phép đăng ký từ miền của bạn.
